 |
 |
|
|
 |
|
TIPI stands for 'TI-Raspberry PI' and names the connection between a TI-99/4A and a Raspberry-PI, using a TI-DSR and a serial connection between both systems,
done - as usual - by accessing reserved memory addresses within the address range of the DSR. As usual in such cases also, a new devices shows up in your system, mostly emulating one or more diskette drives, thus allowing data transfer to the 'outside world' - best case... Why 'best case'? Just read on... | |||
First impressions | |||
|
I acquired my version of this hardware from Australia, by Jason,
but not via their webshop, but via ebay (delivery took 15 days).
Unfortunately, neither the DSR nor the PCB were on their latest release - both versions showed '2020'!
Since then, the hardware went up to - theoretically - Rev 3 (already in 2020...), where you have a jumper to switch off the 32K memory expansion,
which in my case is no problem.
Sadly, there is no official release of this hardware variant by Matthew Splett,
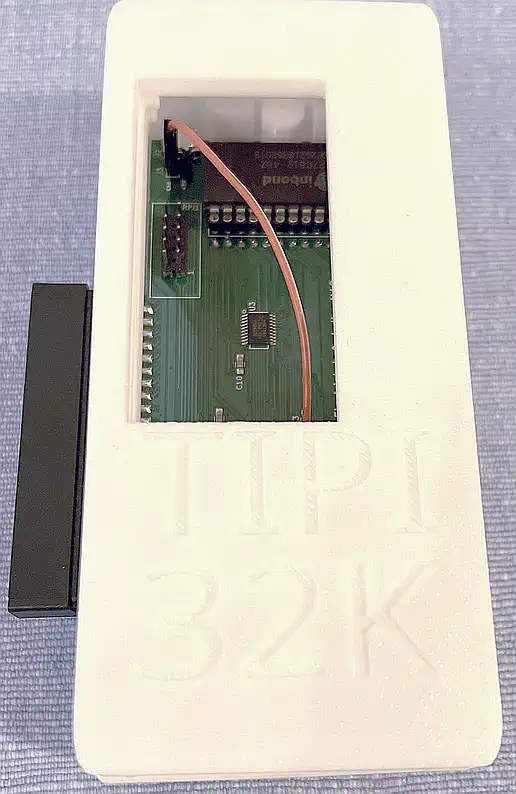
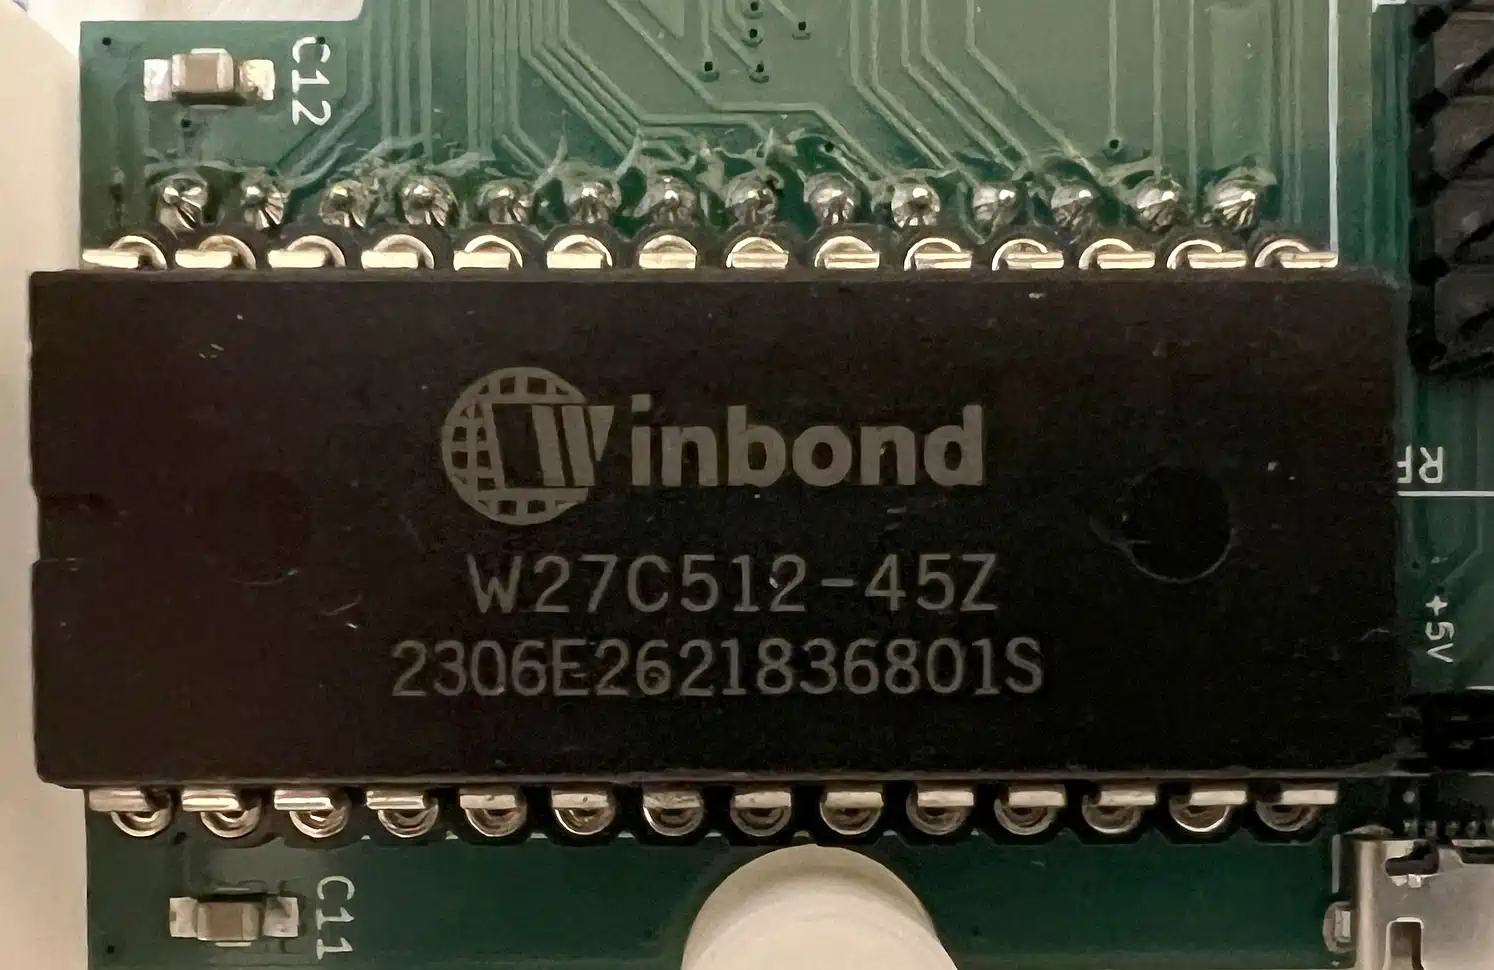
so you have to stay with V2 for the time being. Meanwhile the DSR has been revised several times, but they still sell the unit with the version timestamp 2020-05-25. The initial hardware design used a 32K EPROM 27C256 for the DSR - nowadays they seem to be hard to get, and a replacement with the best pin compatibility would be the Windbond 64K EEPROM W27C512. But this led to the problem with A14 of the EEPROM, which the EPROM doesn't have, and which is tied to +5V on the PCB (to my knowledge, banking isn't used). So, if you want to update the DSR, you must put the code into the UPPER half of the EEPROM's address space! The 3D printed shell, by the way, is made very well - just the lid doesn't want to close flat, so you have to shorten the standoff pin a bit, but after some time has passed... |
 | ||
... WAIT - what about the PI? | |||
|
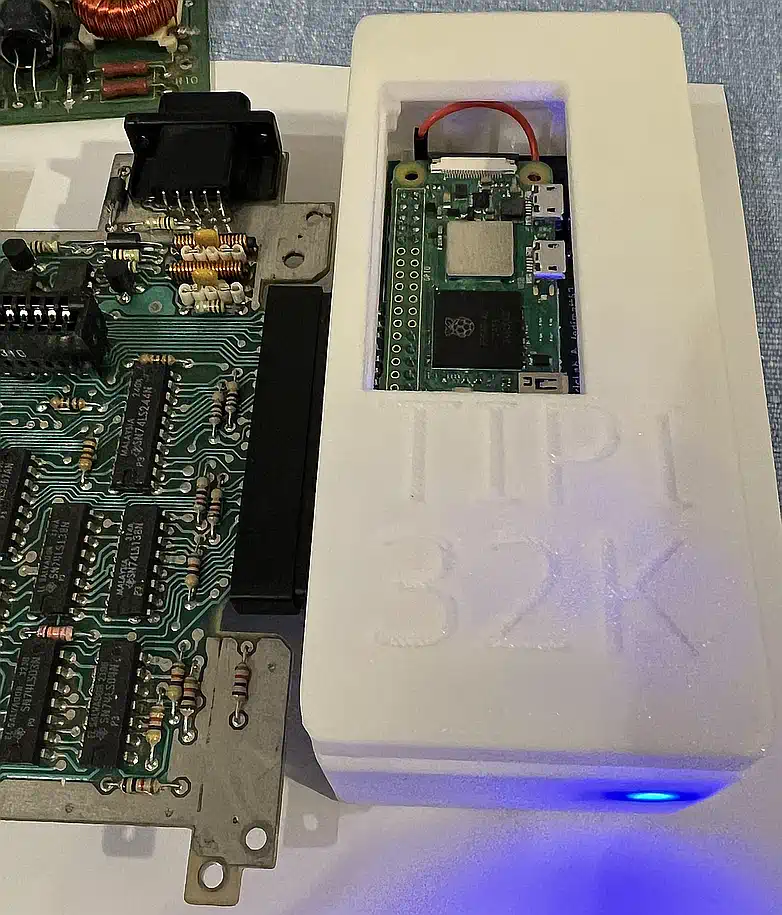
The TIPI thingy did cost around EUR 90,- (not cheap, and you must ADD shipping, and, if ebay doesn't do it, customs will ADD EUR 15,-),
but without a Raspberry Zero W (or 2W - recommended)! Since it is THE essential part, just add EUR 18,- if you get it from Reichelt (Germany), or EUR 20,- from Aliexpress, if you want to wait 2 weeks longer... It is noticeable that the unit comes with a 2x5 header to connect the board, plus a (1mm too long) standoff plus nut and a small pin for the power supply of the PI - not quite the kingdom you expect in exchange for your horse... Oh - since we're talking - it HAS TO BE a type W RasPi, since without WLAN, nothing will be moving here! And now about current requirements: Acc. to the datasheet, it can consume up to 2.5 amps... but you better immediately forget about this! This virtual amount includes a fully loaded USB port plus additional components like a camera - TIPI board and PI2W can easily be powered directly through the expansion port, you just need to connect the pin labelled +5V in the rear left to pin 2 or pin 4 of the PI - and you're done! |
 | ||
Power supply - or: why not hole? | |||
|
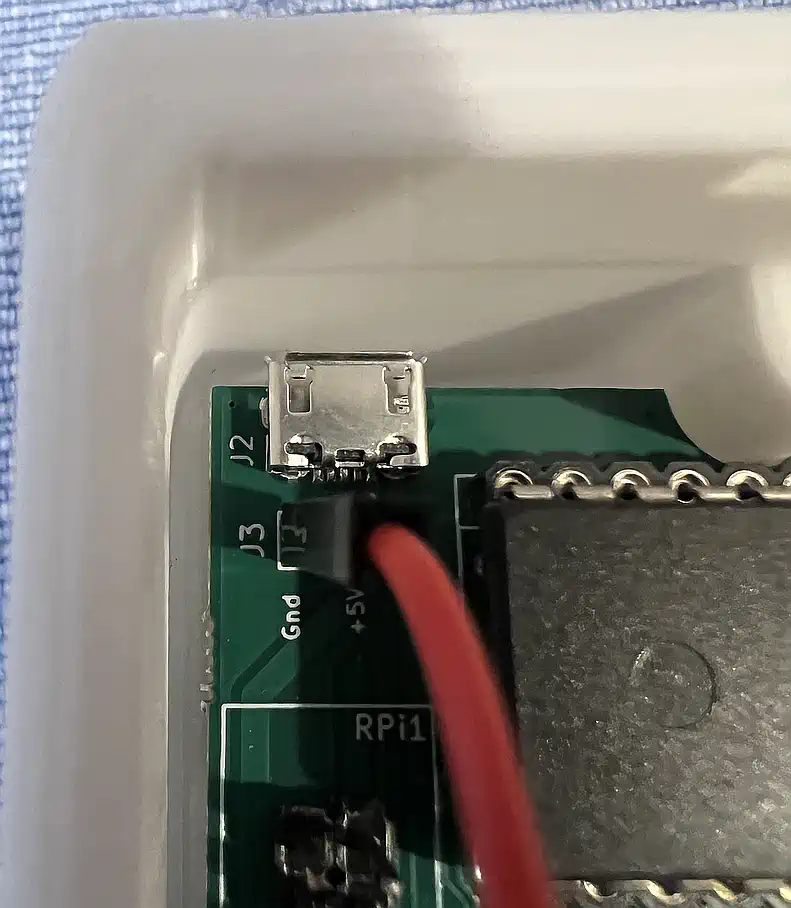
You can't miss it: to use the micro USB connector on the PCB, there has to be a hole in the case - but there is none! And you may ask yourself: what the h***? But, think a bit, the solution is near. This connector seems to be - for whatever reason - some kind of left over, since it supplies the 32K, the CPLD AND the PI! But this would in consequence back-drive the console also, when switched off! Bad idea... The good idea behind: since the PI needs quite a decent boot time (compared to the console), and its web interface can work without the console, it can be an advantage to keep it powered on even when not needing the console, probably all the time. And this is not only because of accessibility, but also - as a recommendation - to not trash the swap file of the PI OS, which is for sure stored on the SD card. So - the PI has its own power port, which you must connect separately with an 90 degree angled USB plug, which is quite a small challenge in this small case... Anyway - I did not use this method and supplied the PI with power from the expansion port - there's nothing that won't allow for a 1 minute boot time... |
 | ||
Installation - or: the new pains of the old W. | |||
|
... and now for something completely different: Software! First of all, we need a SD card to store the PI's operating system - my recommendation is a 32 GB card of good quality, usually SanDisk or Samsung. There you store the current image, which you can find here findet. And if this is version 4.2 - wherever you may have got it from - the following has to be considered:
Oh yes - don't forget: the SD card has to be re-partitioned so you can use the full capacity, since the basic image is designed for very small card sizes - see below. |
| ||
The "built-in" software | |||
|
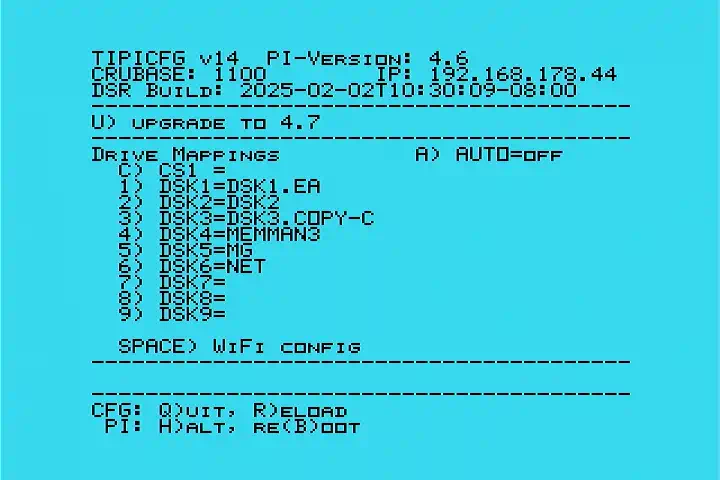
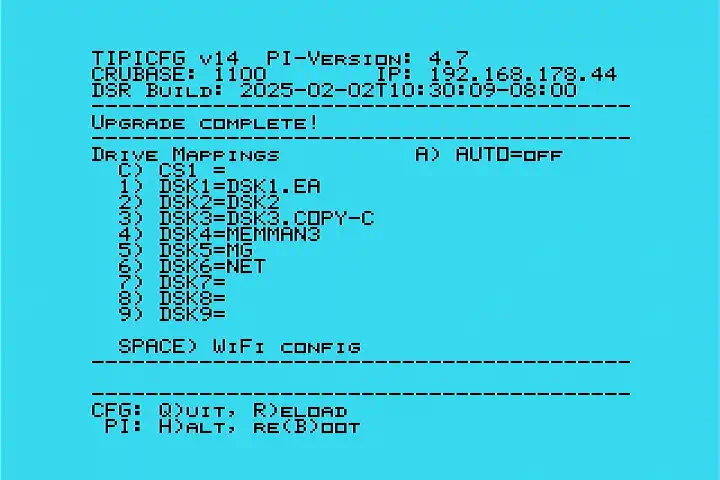
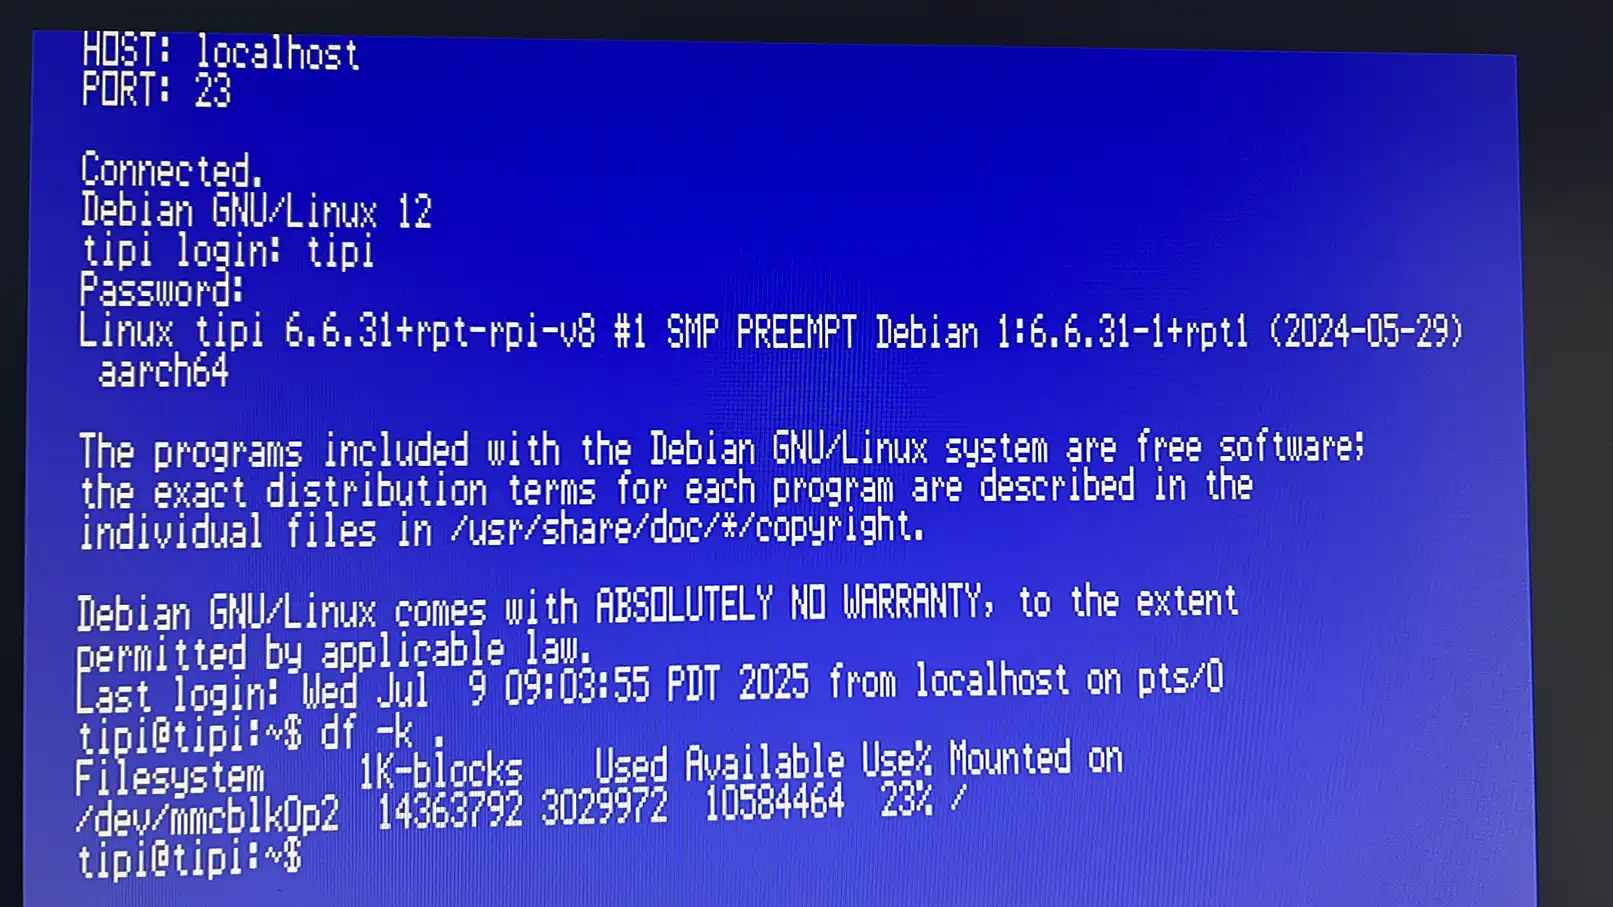
The first point of interest when adding a TIPI, is to call it via TI-Basic: 'CALL TIPI' This, when not providing a parameter, starts the TIPI configuration, and it is essentially just a loader for an EA5 file, whose name is either given ("TIPI." plus fully qualified path name on the SD card), or just loads the config application. For instance, when calling CALL TIPI("TIPI.NET.TELNET") it loads and runs the TELNET client, which is able to use the text screen in 40, 64, and 80 chars per line (requires a suitable video subsystem like the PICO9918). Here, TIPI is the root directory, NET a subdirectory of it, and TELNET is a program file (EA 5), containing the client application. And latest now it is obvious, why the TIPI sidecar comes with a 32K memory expansion: nearly all of its added functionality requires the 32K! Since we already started the TELNET client (login name and password: tipi), let us expand the boot partition up to the limits of the SD card:
Why expand the partition? Well, all data and programs you are going store in TIPI has to be put here, so you definitely want all of this space to be available, don't you? |
 | ||
Upload of files or disks, or: The Web Interface | |||
| This is neither trivial nor well explained... as long as you require basic file access (load and run EA 5 file), you may upload nearly everything you can get hold on, but to know how to use to its full extend - or what you can't do, since the TIPI DSR is not intended to provide the full file-I/O features of a disk controller! - requires more knowledge as I could acquire in the meantime - so: Stay Tuned and come in now and then! | 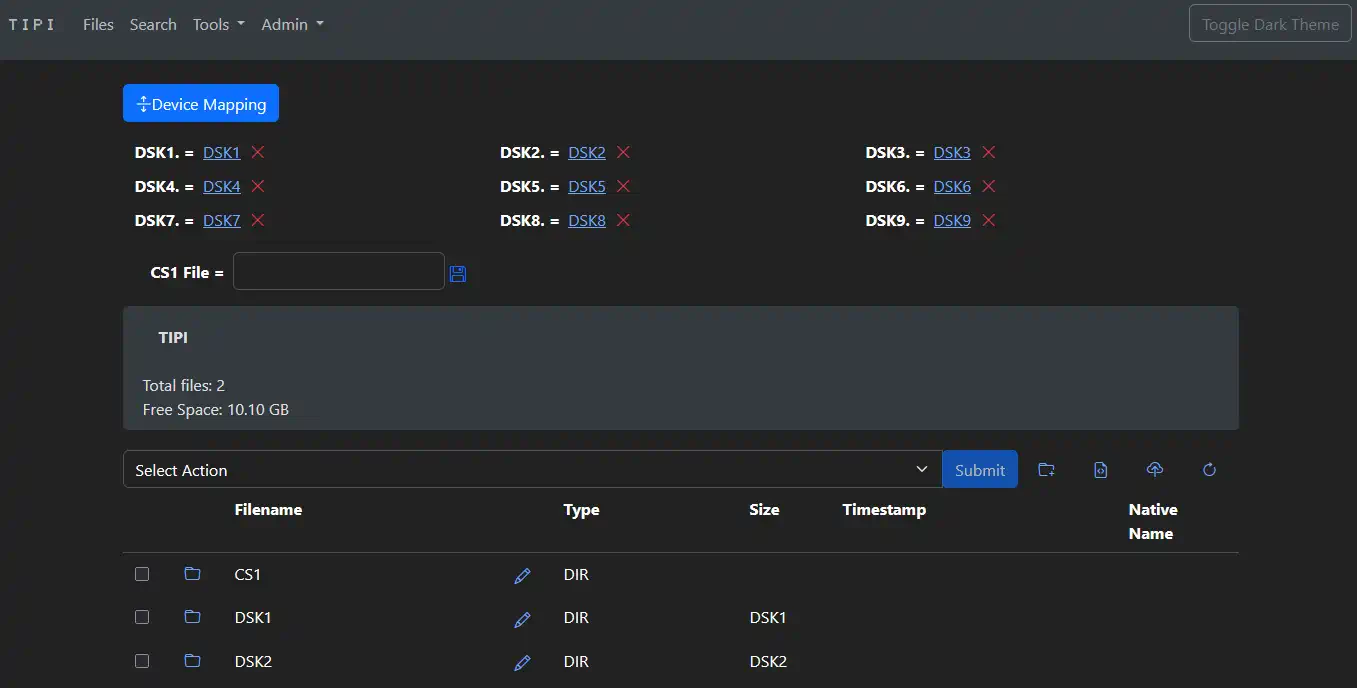 | ||
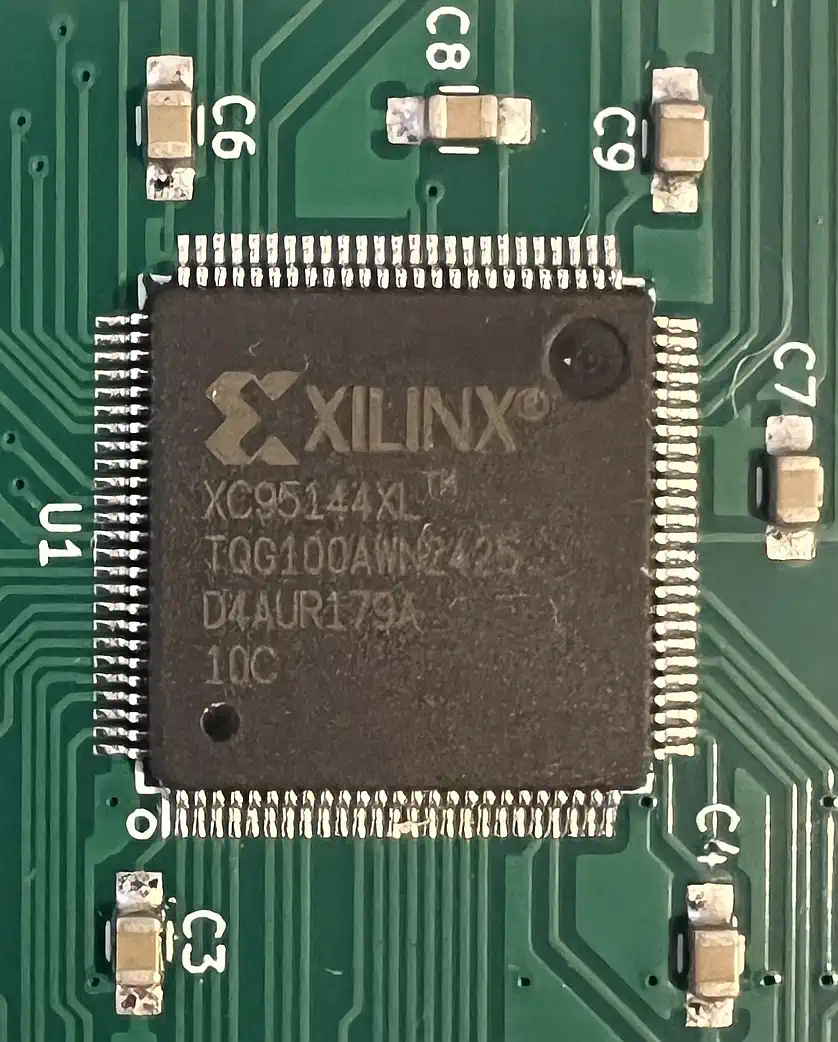
DSR and CPLD upgrades | |||
|
This is where it gets a bit complicated... to upgrade the DSR you have to remove (!) the EEPROM, since no measures have been taken to update it while mounted. And since the initial design used an EPROM 27C256, the DSR has to be programmed twice, since you could expect - theoretically - that address bit 14 is tied to +5V... but these details as well as a possible banking didn't find its way into the documentation, and you may have to search Atariage... or ask Matt directly. There are no CPLD upgrades - my board is on the latest release. Anyway you would have to enable the JTAG connection between board and PI, but this is something, I (at the moment) consider being not necessary. |
^
| ||
| Contact: {anyname}@{use_the_url}.net |
All pictures on this whole website were made by myself. Should you find them elsewhere, they're stolen from here! |
Last updated: 2025-11-30 CW |