 |
 |
|
|
 |
|
The old console took damage during her three decade exile - mostly due to slow corrosion. This was not because of excessive air humidity, but simply because of age, plus the fact that some contacts were silver coated, so corrosion was promoted. During the first exposition to the power supply (admitted: this was very unprofessional), most of the voltages were out of spec, and nothing happened - dead on arrival... Due to the really large amount of pluggable connections, which were only partially gold plated, I decided not to go through all of them, but to rebuild it from scratch, taking into consideration all of the new developments that meanwhile took place in the TI scene. So - one of the consequences was: while rebuilding (everything had to go), the new power supply had to monitor itself and must ensure providing healthy current. | ||||
The Concept | ||||
|
This time, the DC voltages should be provided by the PEB, and the console should use separate relays to feed the individual rails to what is in the silver box -
at first providing a separate 5V rail for the Mechatronic 80 column card, that would be activated some 100 milliseconds before the rest would be powered. The old fan, which requires AC, should be running permanently - it really is noiseless. Operating the power supply should be performed by a simple push button, the three voltages should be displayed permanently, and everything should be sequenced by a well-defined state machine. Applying power to the console should only be possible if all voltages are in their acceptable range, and I sure wanted to have some show effect. To implement the show, a small TFT display and a TOF sensor were necessary, because I wanted to raise the dimming as soon as someone approaches the unit. ... and to increase the overall complexity, everything described before should be mounted to the meanwhile unobtainable acrylic panel at the front left side... As a result from all of these requirements, the complete switching and monitoring indicated the use of a MCU from the Arduino type. My choice was an Arduino clone of an ATMega328, the LGT8F328P by Logic Green. It comes with a fourth timer (16 bit wide), outputs capable of driving 80mA, 32 MHz clock frequency, some improved ADC and a flash rom with increased data retention time. |  | |||
The Hardware | ||||
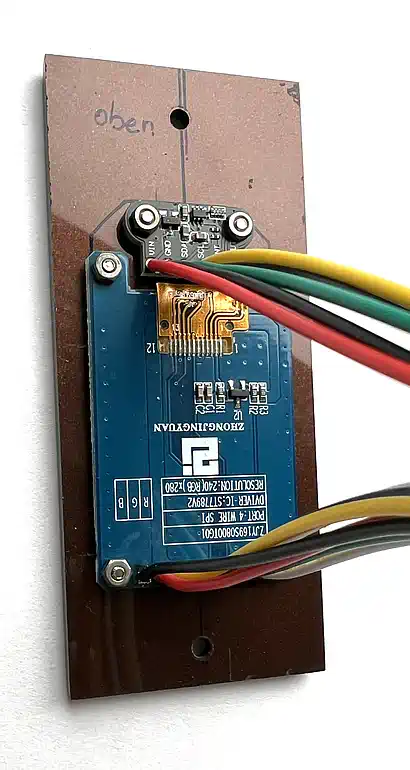
Simply said, the complete control unit consists of these components:
|


 | |||
Where to get all this stuff | ||||
|
I generally dislike to provide links to shopping sites, with the exception of those that are hard to find. All components of this whole control unit (and, in general, all of the hardware described on this site) were acquired either from Aliexpress, from the german vendor AZ Delivery (an expensive but reliable source for what you can get cheaper, slower, and maybe never from Aliexpress), or from the deep vaults of my too large personal collection of electrical and mechanical components, often with untraceable origin... All the mounting stuff, fixtures, cables, screws, nuts, tools, standoffs etc. I honestly bought new and in very good quality from Aliexpress. | ||||
The software | ||||
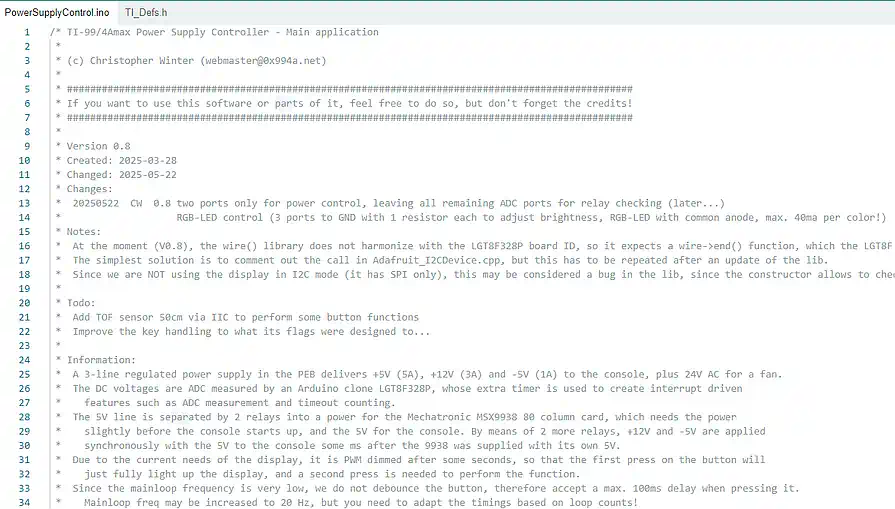
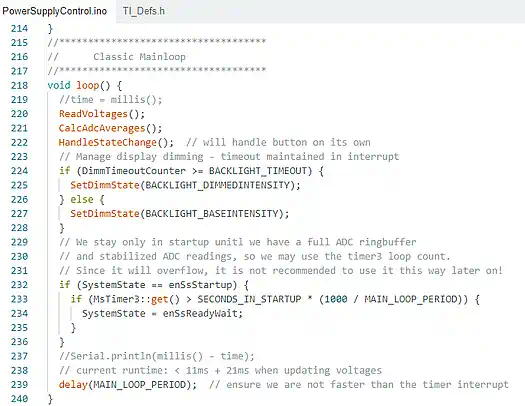
| I will upload the software to Github soon - for the time being take some irrelevant screenshots: |
| |||
| Contact: {anyname}@{use_the_url}.net |
All pictures on this whole website were made by myself. Should you find them elsewhere, they're stolen from here! |
Last updated: 2025-11-24 CW |